📐 Getting set up with Tiled
This tutorial will guide you through getting set up with the Tiled map editor. Tiled is a popular free & open source 2d map editor that can support many game engines, including Get Lost's custom engine. Most of your level design work will take place in Tiled.
Download Tiled
The Tiled map editor is available on itch.io. Download and install it.
Create your project folder
Somewhere on your harddrive, create a folder that will contain everything for your level. We'll call this folder test-level but you can call it whatever you want. Inside the test-level folder that you just created, create the following folders: tiled, art, sounds, and code. So now your folder structure should look like this:
test-level/
    tiled/
    art/
    sounds/
    code/
Gather your art assets
Before you can start building a map, you should collect some of the basic art assets that you want to use in the map. We'll put these assets in the different folders that we created in the previous step.
Tilesets
You'll need a tileset to use. We'll use the free Pixel Plains tileset available here.
![]()
Go ahead and download the free version and extract the assets to the art/ folder in your project folder.
Create the map
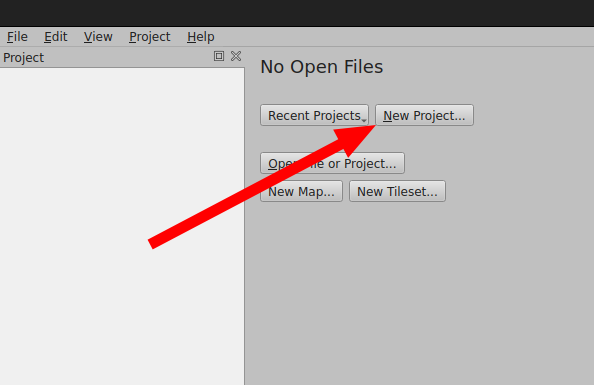
Now that you have your art assets in place, you're ready to create a new project in Tiled. Open Tiled, click "New Project", and save the project in the tiled/ folder of your project folder.
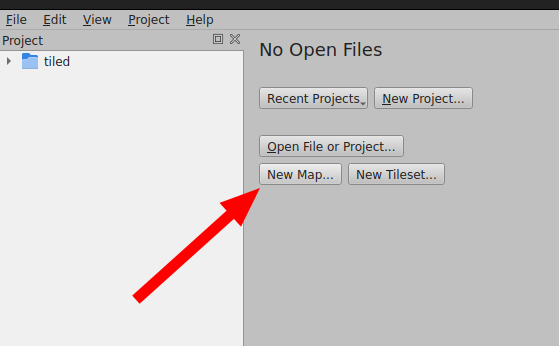
Now click "New Map":
When the map settings open, change the Map Size to "Infinite" and the "Tile Size" to 16px by 16px:
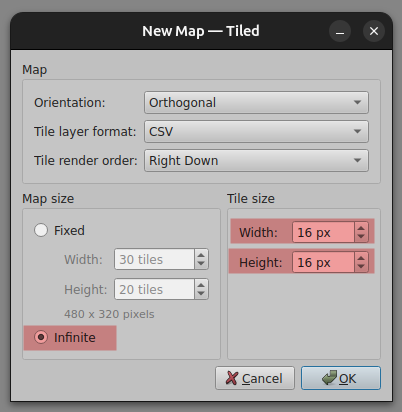
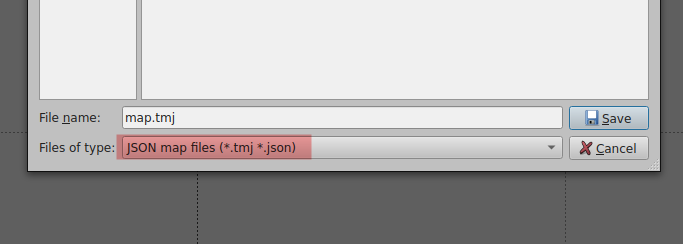
Then save the map with ctrl+s and save it in your tiled/ folder as a "JSON Map Files"
Warning
You must save your map as a .tmj file, not a .tmx file. Get Lost only understands .tmj
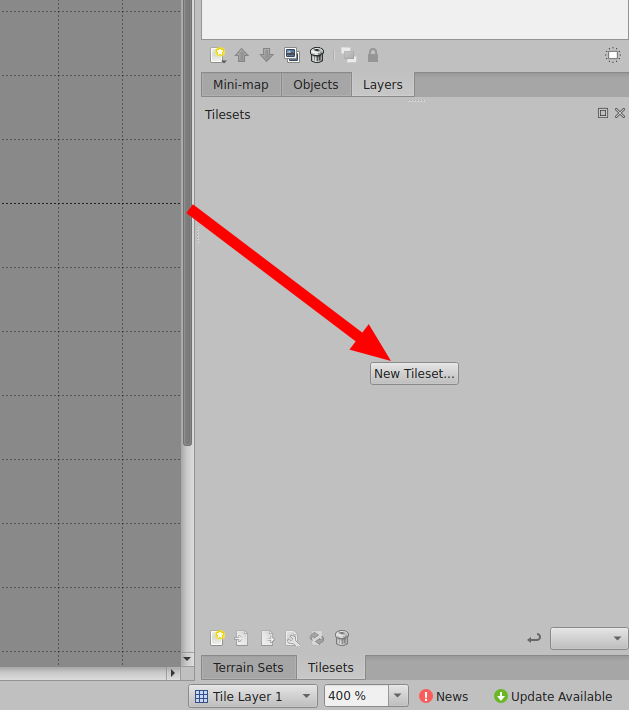
Add your tileset
Let's add the Pixel Plains tileset that you put into art/ to our project, so that we can place tiles into the map.
First, click "New Tileset":
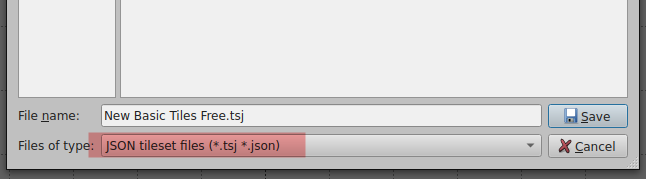
Then browse to your tileset (in the art/ folder) and select it. Make sure that the tile size is 16px by 16px:

Click "Save as" to save your tileset file. Save it in tiled/ folder, and make sure to save it as a .tsj file.
Warning
You must save your tileset as a .tsj file, not a .tsx file. Get Lost only understands .tsj
Once you save your tileset file, you'll be brought back to the main Tiled interface, but on the tab for your tileset. Switch from the tileset tab back to your map tab:
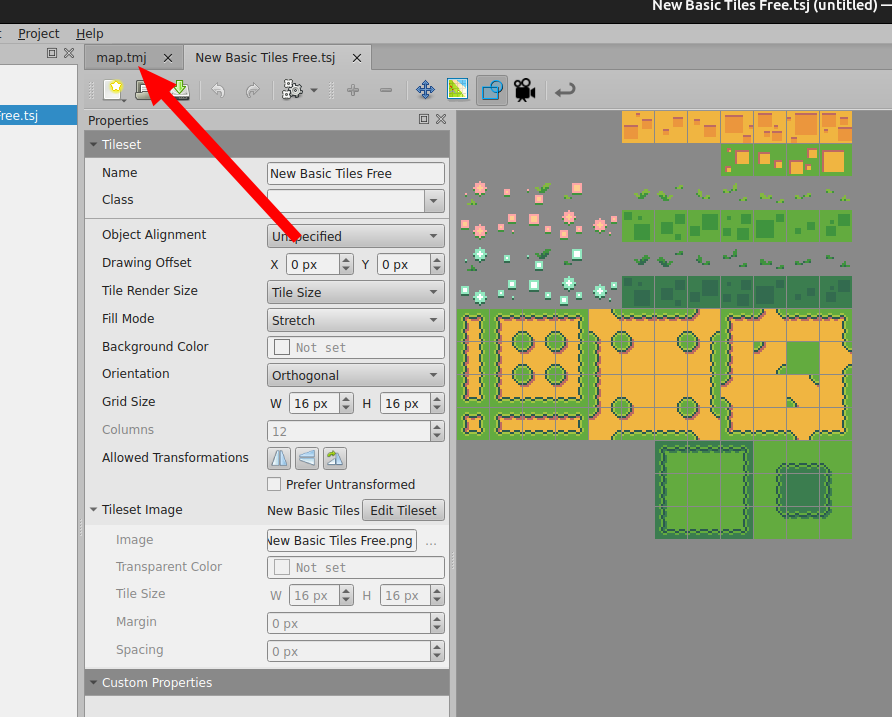
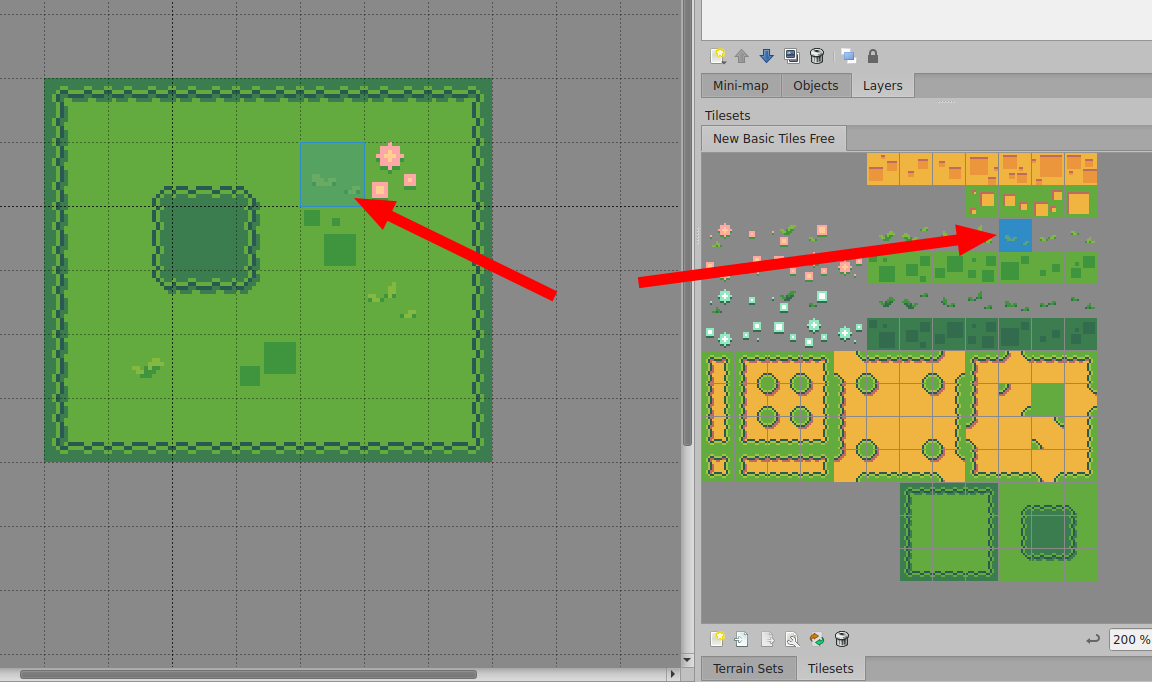
Now you can use the tile stamp tool to place tiles in your map:
Next steps
You're going to want to become familar with the basics of the Tiled map editor, which is outside of the scope of this tutorial. The best resource for this is the Tiled documentation. There are also some good videos on Youtube. The following Youtube playlist is a little old, but covers the basics pretty well:
After that, you'll be ready to look at the other map tutorials in the Get Lost Docs.